HELTEC ESP32S3 SX1262 1.9 inch LoRa Meshtastic LoRaWAN 868Mhz
Product Link
Description
Note Please upgrade to the latest firmware for a better experience: https://github.com/NMminer1024/NMMiner
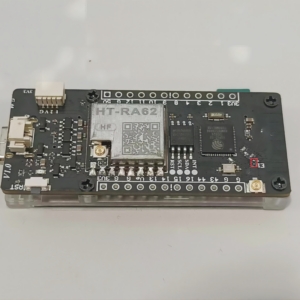
Vision Master T190 (HT-VMT190) is a development kit with ESP32-S3 and LoRa Module (optional). The onboard 1.9-inch TFT-LCD display contains 170 (RGB)X320 dots and can display up to 262k colors.
Working with the sample programs and development tools we provide, users can operate the display via Bluetooth, Wi-Fi and LoRa. It also supports daily entry-level programming, and runs open source projects like Meshtastic.

Feature
ESP32-S3R8 MCU, support Wi-Fi and BLE.
LoRa module is optional, compatible with Mashtastic.
Low power consumption, 18uA in deep sleep.
Onboard SH1.25-2 battery interface, integrated lithium battery management system (charge and discharge management, overcharge protection, battery power detection, USB / battery power automatic switching).
Powerful display function, onboard 1.9-inch TFT-LCD display contains 170 (RGB)X320 dots and can display up to 262k colors.
Storage condition: -30 ~ 70℃, ≤45%RH.
Optimal operating condition:-20~60℃, 55±10%RH.
SH2.0-4P sensor interface is compatible with QuickLink series sensors.
Compatible with Arduino, we provide development frameworks and libraries.
Specification
Parameters
Description
Master Chip
ESP32-S3R8
LoRa Node Chip
SX1262
Frequency
470~510MHz, 863~928MHz
Max. TX Power
21±1dBm
Max. Receiving sensitivity
-136dBm@SF12 BW=125KHz
Wi-Fi
802.11 b/g/n, up to 150Mbps
Bluetooth
Bluetooth LE: Bluetooth 5, Bluetooth mesh
Hardware Resource
7*ADC_1, 6*ADC_2, 11*Touch, 3*UART; 2*I2C; 2*SPI. Etc
Memory
384KB ROM; 512KB SRAM; 16KB RTC SRAM; 8M*PSRAM; 16MB SiP Flash
Interface
Type-C USB; 2*1.25 lithium battery interface; LoRa ANT(IPEX1.0); Wi-Fi ANT(IPEX1.0); 2*12*2.54 Header Pin; SH1.0-4P sensor interface.
Battery
3.3~4.2V lithium battery power supply and charge.
Operating Temperature
-20 ~ 70 ℃
Dimensions
60*25.4*10.19mm
Display
Onboard 1.9 Inch TFT-LCD Display
Pin Map


Vision Master T190 has a rich set of pins and hardware resourcs,which will allow you to expand widely.The SH1.0-4P interface can be directly connected to the QuickLink series sensors.

A transparent plastic support platform is install between the PCB and the display frequency, which can protect the electronic components on the board and enhance the heat dissipation function fo the board
Lora modules ard optional and can reduce a lot costs if you don't need a LoRa module.

Resource
FAQ
Can the onboard 2.4GHz antenna be replaced?
The default configuration of T190 board is PCB antenna, and the 2.4GHz antenna is a spring antenna. There is an additional interface on the board for 2.4GHz wireless signals. When connecting an external antenna, the resistor needs to be rotated 90 degrees to the left.
What development methods does it support?
Arduino
Micro Python
PlatformIO
Espressif IDE
We strongly recommend using Arduino. We have complete technical support and provide complete LoRaWAN code for ESP32 Arduino framework.
What’s the battery socket type?
You can find this type of socket by search “SH1.25 x 2”.
I can not find serial port.
Please reinsert your USB cable, or try another cable.
If you use USB adapters, try to skip them and connect directly to the USB port on your PC.
Open your DEVICE MANAGER, select the port, and if prompted, try to install the CP210X driver
Try another computer or a different system
The serial port does not exist.
Open your DEVICE MANAGER, check to see if the device port can be found. If not, please refer to the previous topic “I can’t find serial port”.
Please check if your serial port is opened elsewhere.
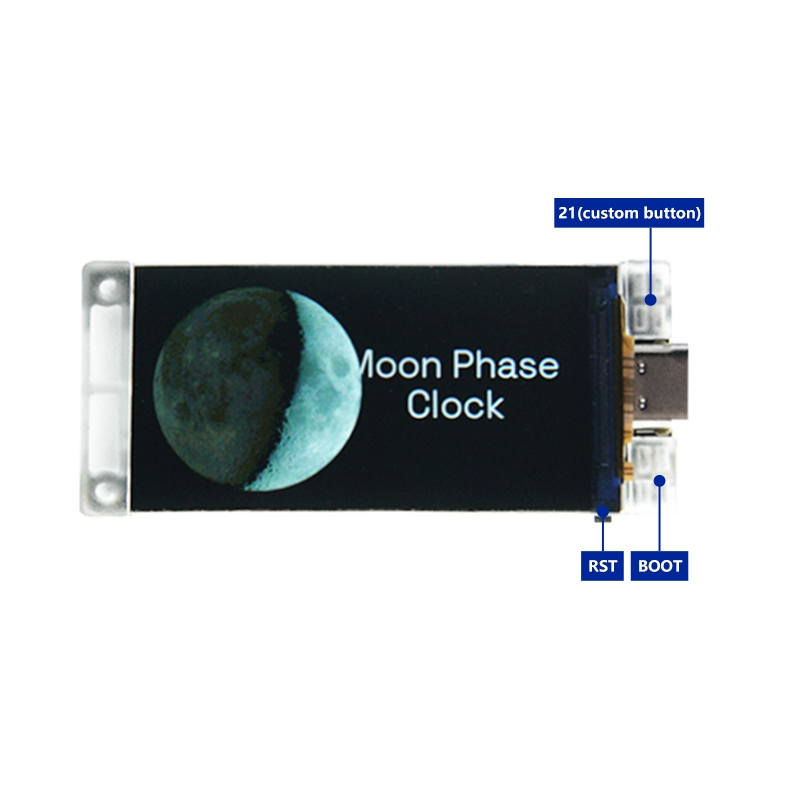
Enter the BootLoader mode to upload, there are two ways to enter the mode:
connect the USB cable, hold down the User (or ORG or Boot) key, press RST once, and then release the User (or ORG or Boot) key.
Hold down the User (or ORG or Boot) key, then connect the USB cable.
What are the specifications of the sensor connection cable?
This is a 10cm sensor adapter cable with specifications ranging from SH 1.0-4P to PH 2.0-4P. It is used to connect the development board and sensors. The sh 1.0-4P port is used to connect to the interface of the development board, while the ph 2.0-4P port is used to connect to the sensor interface. If you need this product separately, you can purchase it through this link. Specification of board sensor connection port

How to Start the Development Board?
Press and hold the Boot key, press RST once, and then release the Boot key. Alternatively, keep holding down the boot button and then connect the USB. Among them 21 button can be customized by user.
Last updated
Was this helpful?