Windows version:
We will take Mixly1.0 (Windows version) as example.
Install Software:
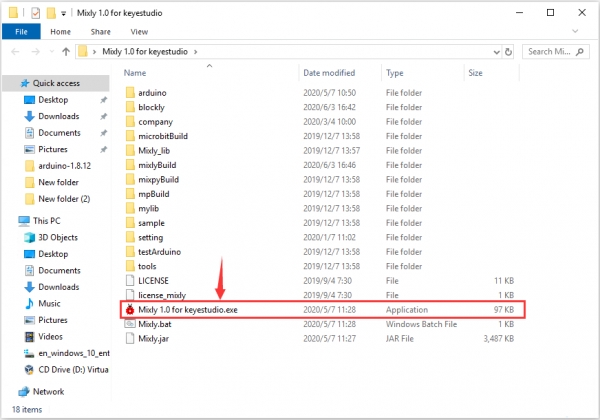
You will get installation package after downloading. As shown below:

Unzip the package, you will see “Mixly 1.0 for keyestudio.exe”
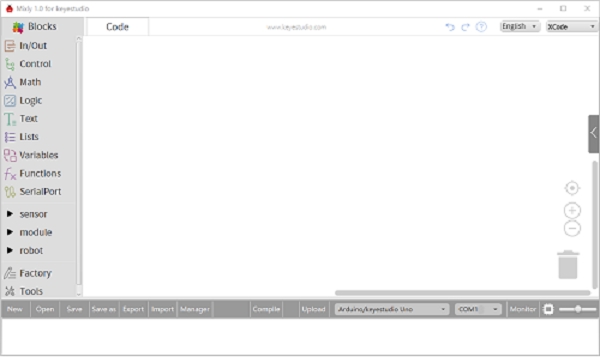
Double-click ”Mixly 1.0 for keyestudio.exe”, the following interface pops up.
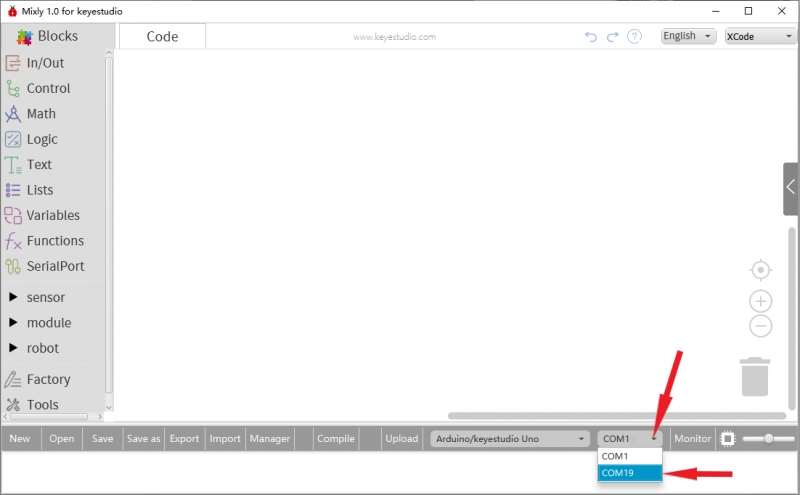
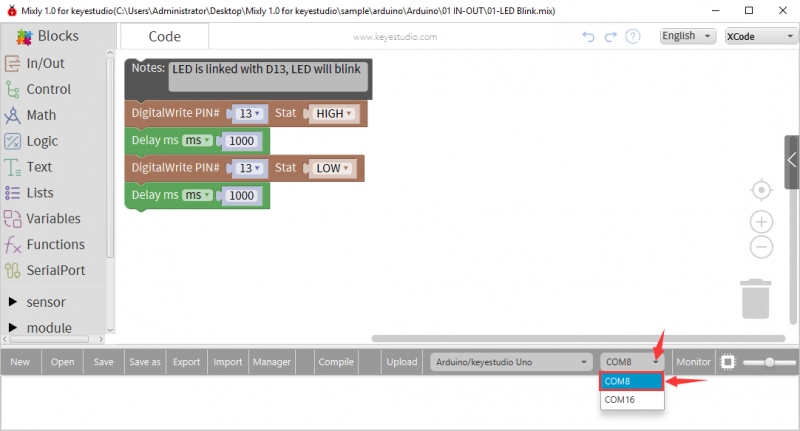
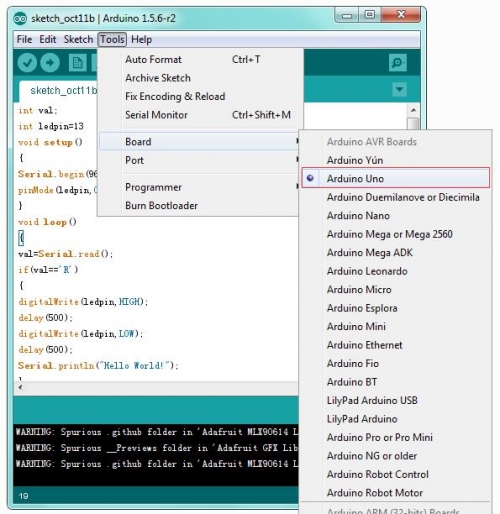
We have to choose correct Arduino development board and name, as shown below:

Select correct COM port(the corresponding port will be shown after installing driver successfully)
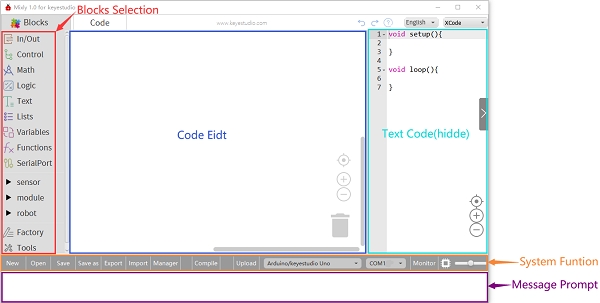
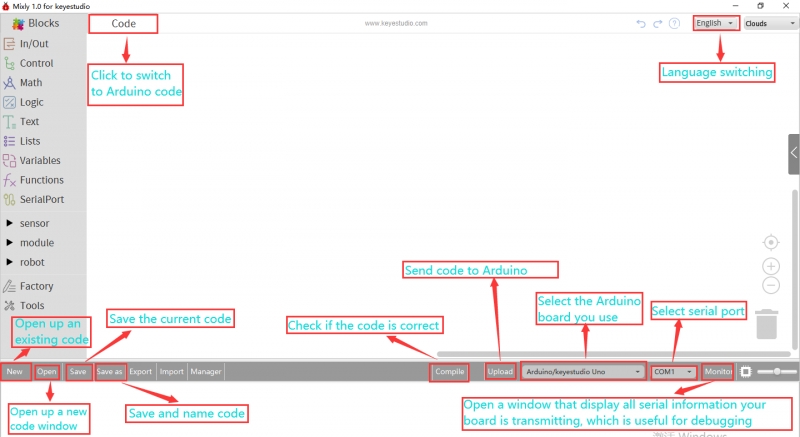
You have to know the function of every area and interface on Mixly software before uploading program on Arduino development board.
Install the driver of the development board
Next, we will introduce the driver of the development board. The driver installation may have slight differences in different computer systems. So in the following let’s take an example of the driver installation in the WINDOWS system.
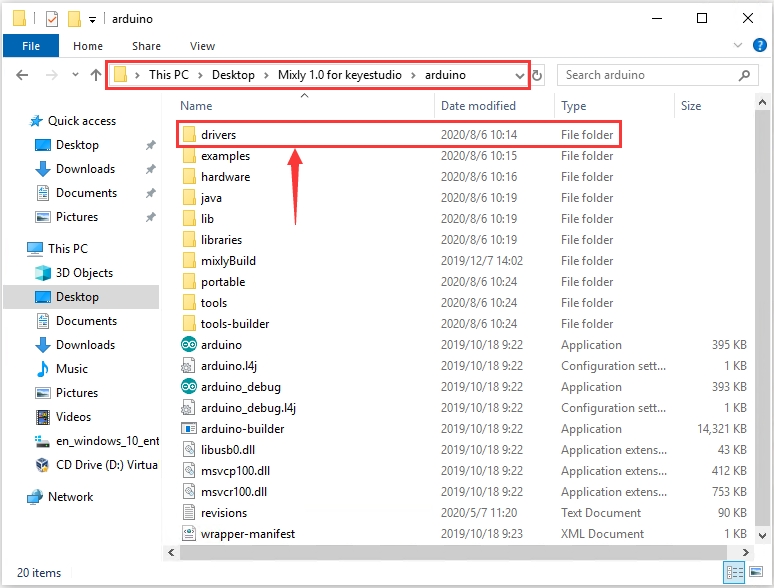
Mixly 1.0 for OpenELAB folder contains its software and driver files. Before we launch the Mixly software, you only need to install the USB drivers.
Double-click the Mixly 1.0 for OpenELAB folder—> arduino—>drivers
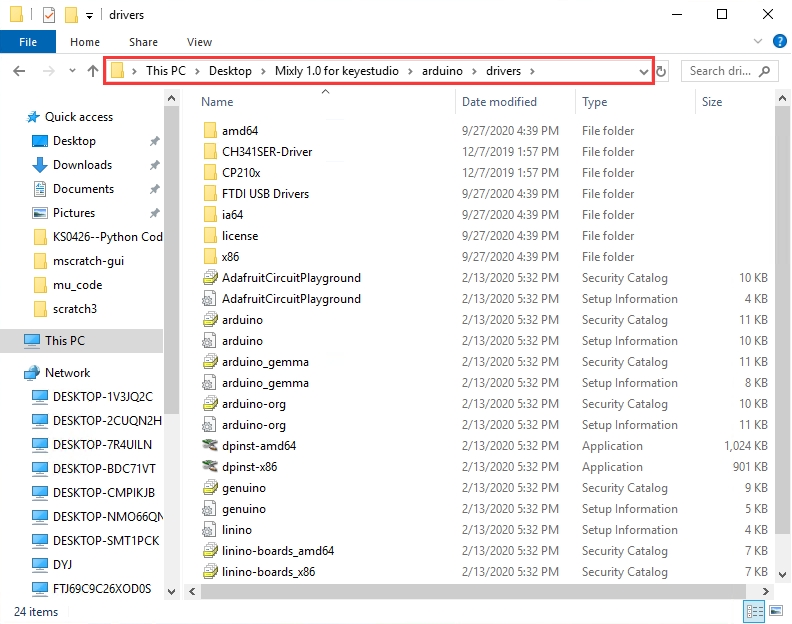
The driver files are shown below:
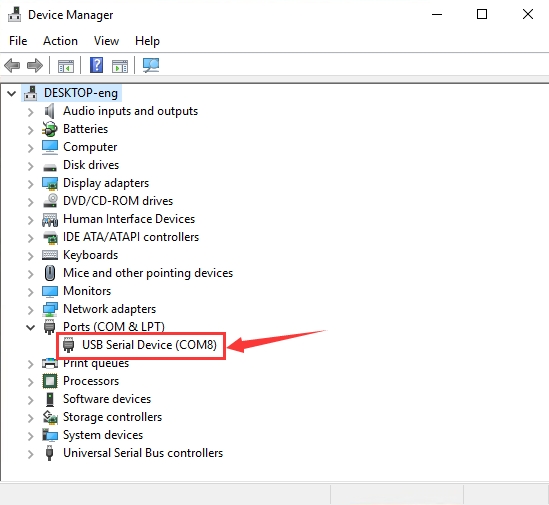
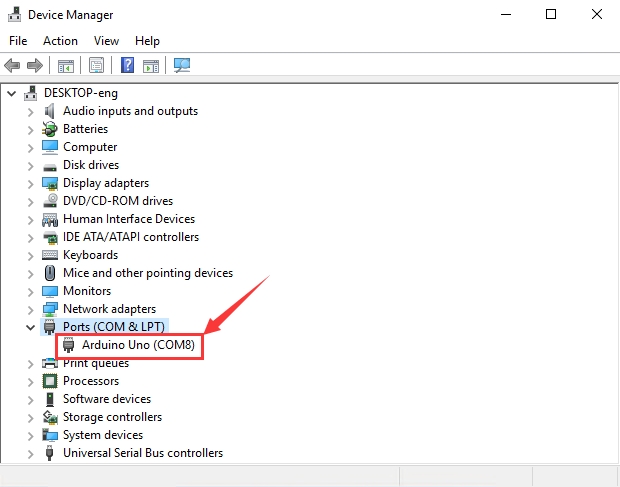
Connect the EASY Plug control board V2.0 to the computer with a USB cable. Right click the icon of your“Computer”—>“Properties”—>“Device manager”.
If your computer is Windows10, the USB Serial Device(COM8) will be shown. That indicates that the USB driver is installed. But for other systems like Windows 7 or 8, you may have to install the USB driver manually.
Right-click USB Serial Device(COM8) to select Update driver

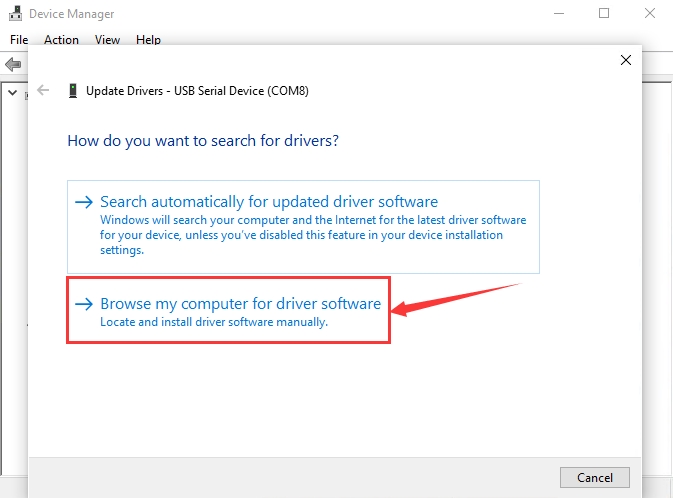
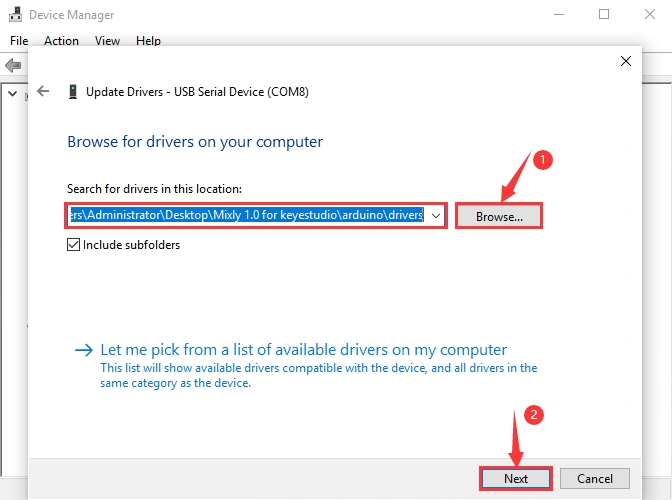
Click “browse my computer for updated driver software”, find out the drivers folder and enter “driver” to search in rectangular box. Click “Next”, the driver will be installed successfully
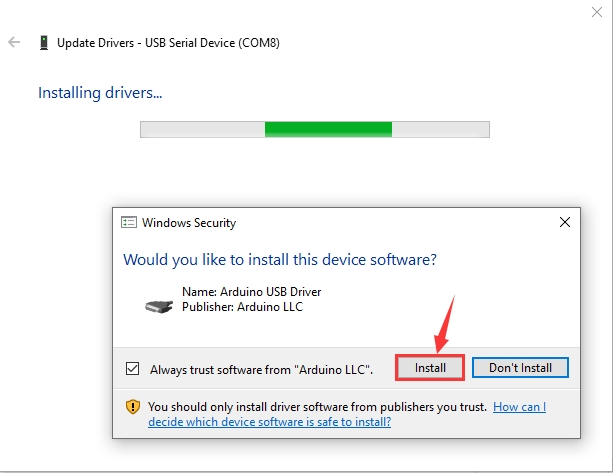
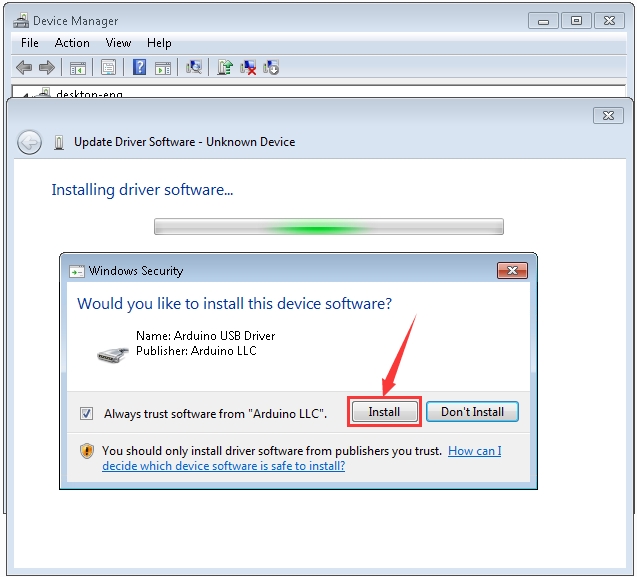
Click Install to wait for the installation
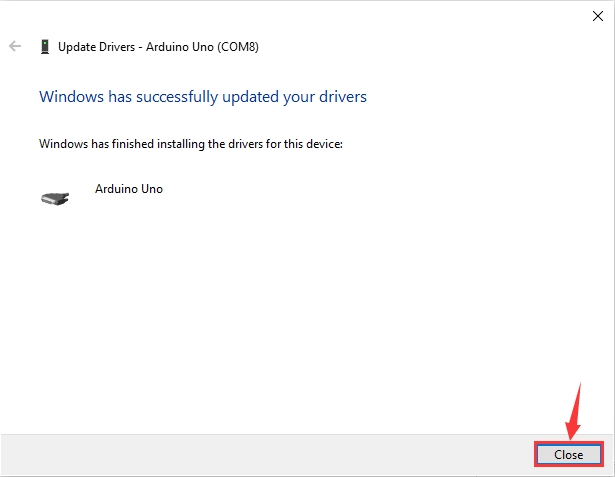
Click Close and you can see the following device in the Device Manager.
If your computer is Windows7/8, please follow our instruction.
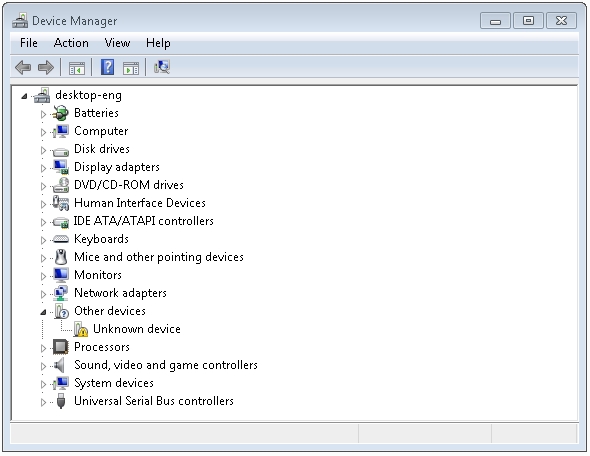
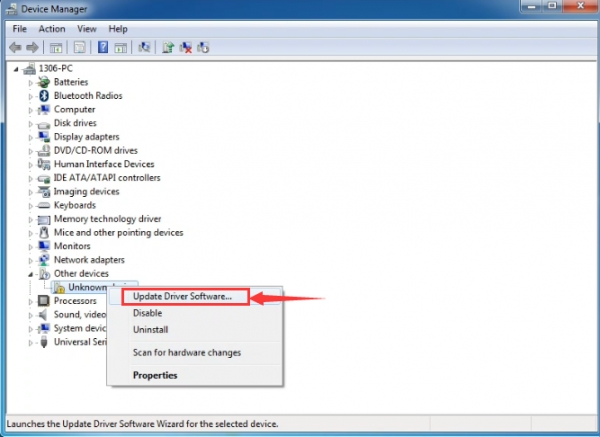
When you connect the board to your computer at the first time, right-click the icon of your “Computer” —>for “Properties”—> click “Device manager”, under “Other Devices”, you should see an icon for “Unknown device” with a little yellow warning triangle next to it.
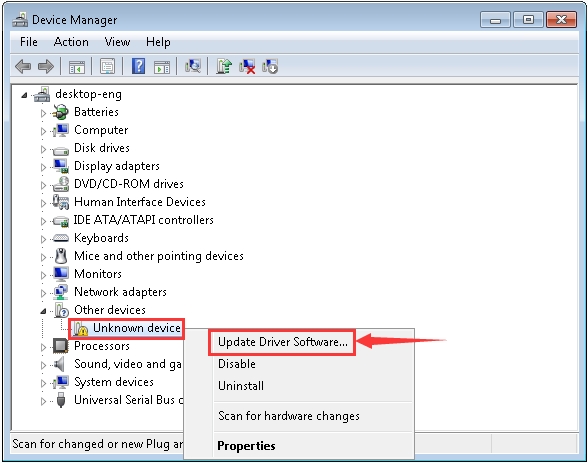
Then right-click on the device and select the top menu option (Update Driver Software...) shown as the figure below.
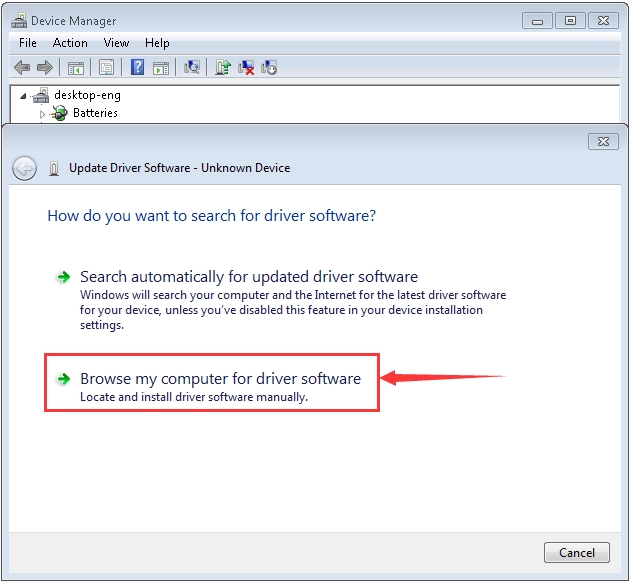
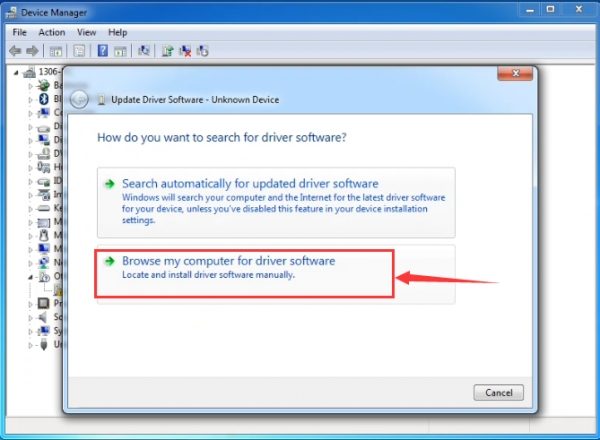
It will then be prompted to either “Search Automatically for updated driver software” or “Browse my computer for driver software”. Shown as below. In this page, select “Browse my computer for driver software”.
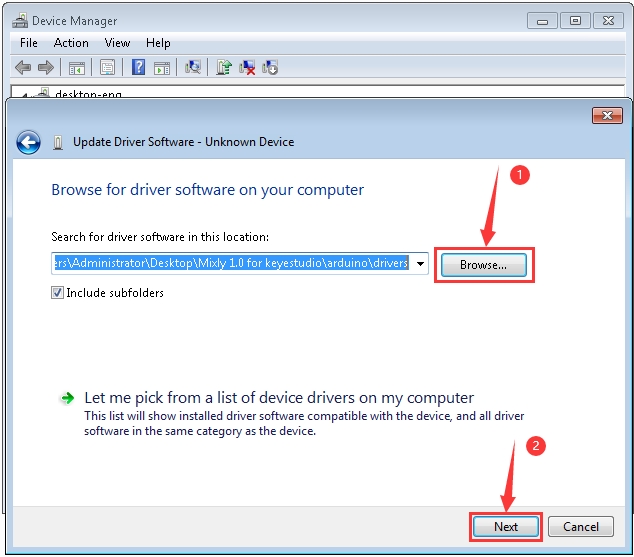
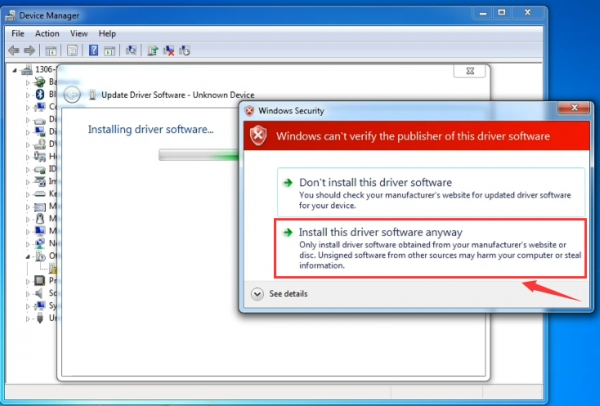
Click “Browse”, then find out the drivers folder and enter “driver” to search in rectangular box. Click “Next”, the driver will be installed successfully. (I place Arduino software folder on the desktop, you could follow my way)
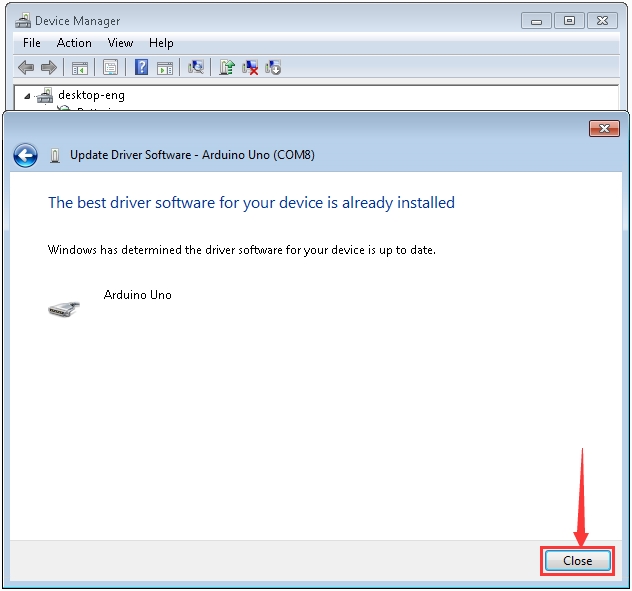
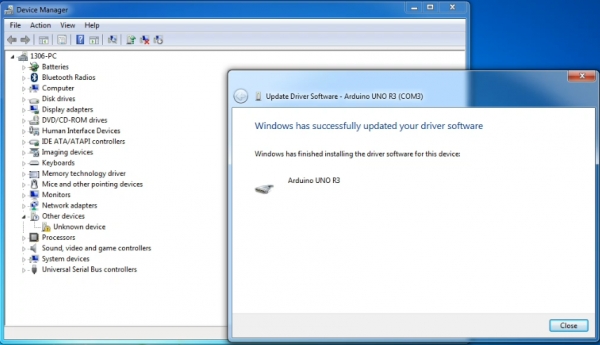
The driver of your device is already installed.
Click“Close”
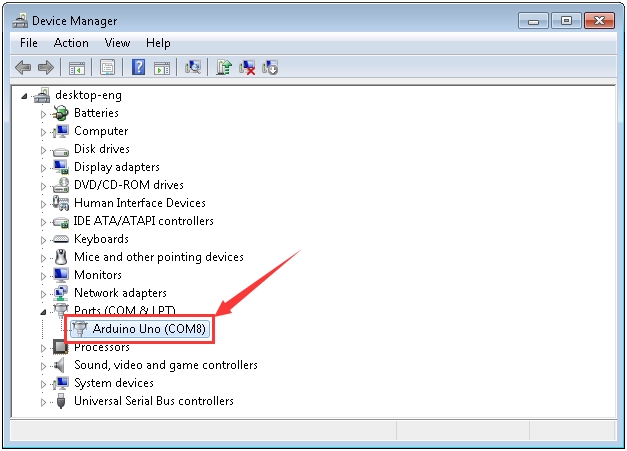
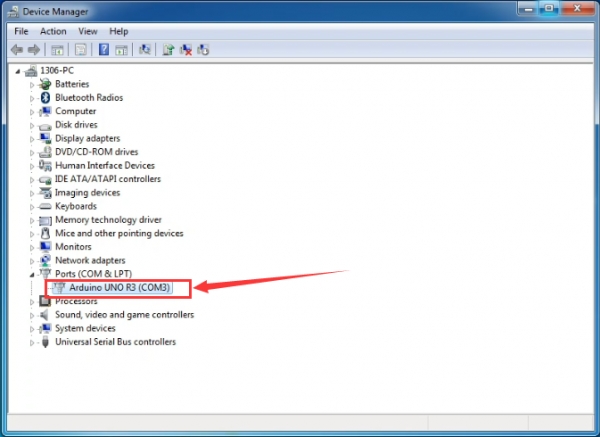
Up to now, the driver is installed well. Then you can right click “Computer” —>“Properties”—>“Device manager”, you should see the device as the figure shown below.
Start the first program
Click “Open”→ sample → arduino→ Arduino → 01 IN-OUT→01-LED Blink.mix

We have to choose correct Arduino development board and name, as shown below:
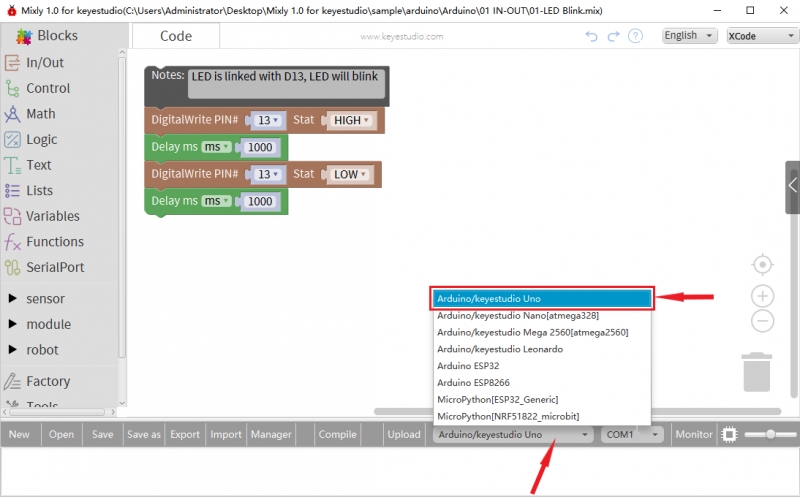
The corresponding board and COM port will be shown after setting board and COM port.
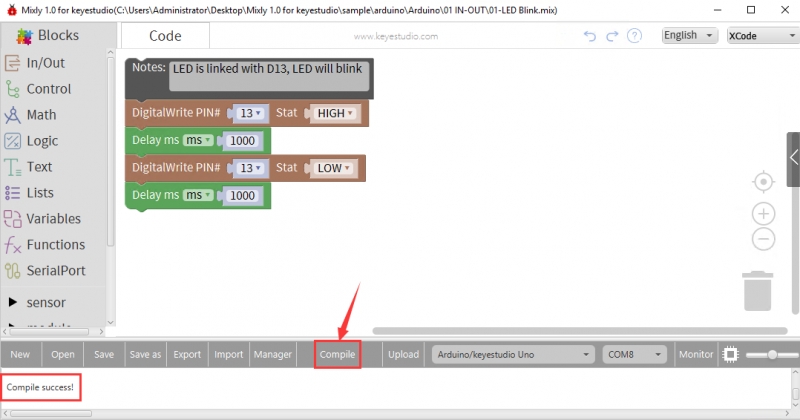
Click Upload to upload the program

Upload successfully. After uploading the program successfully, the onboard LED lights up for 1s, lights off for 1s.
Import the Library
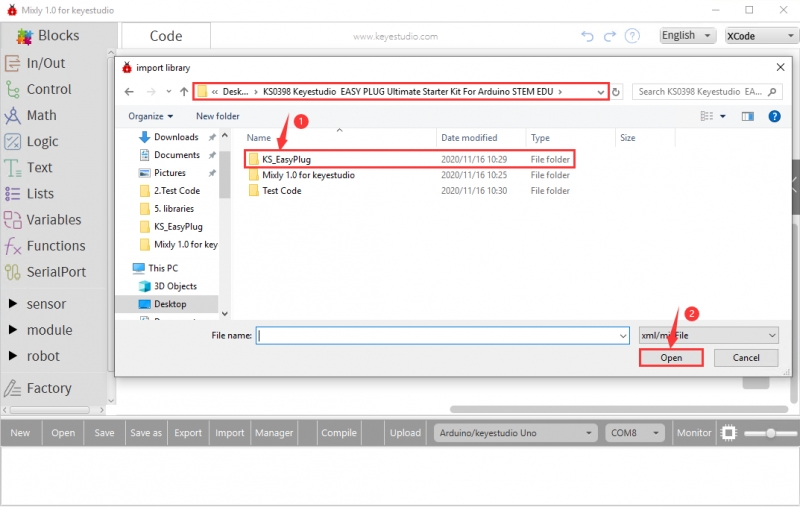
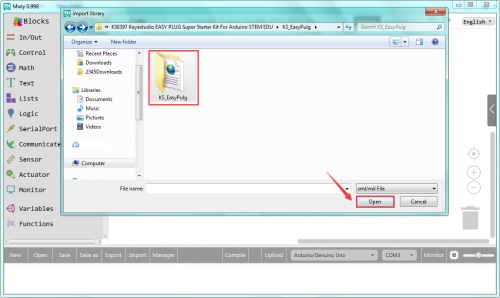
Open Mixly 1.0 for OpenELAB software, click“Import”then select“Local import”, as shown below:
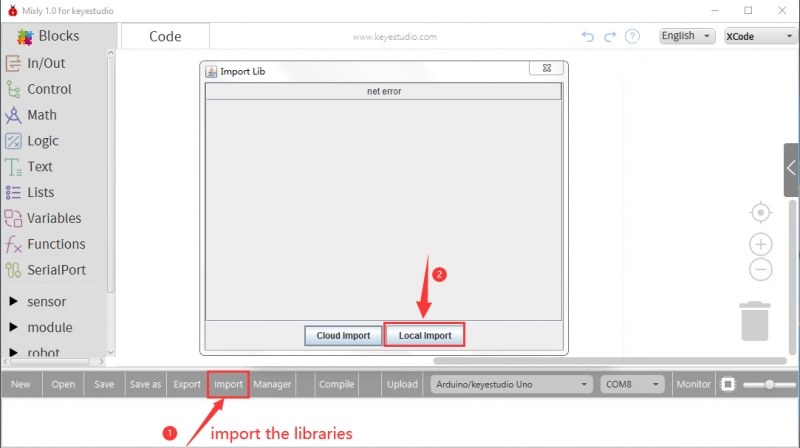
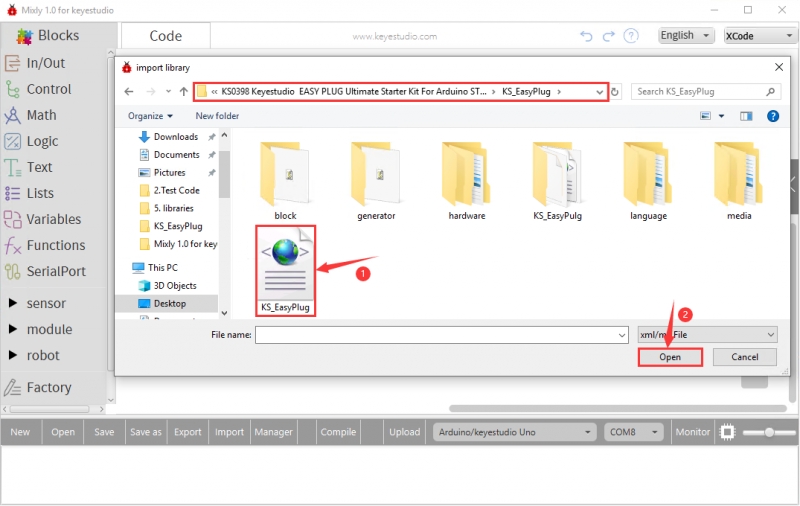
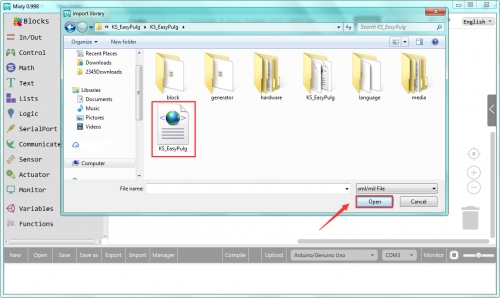
Double-click the folder“KS_EasyPulg”and select“KS_EasyPulg”library file
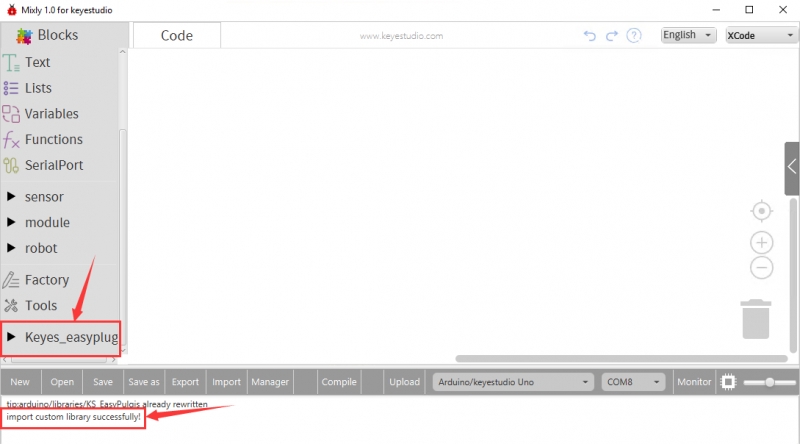
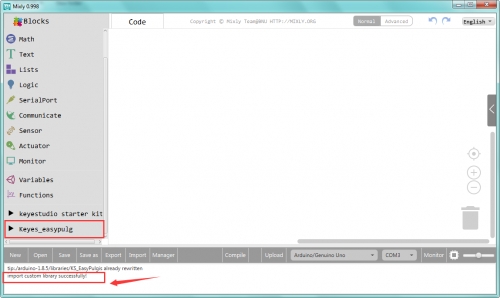
After importing it, you will see it in the blocks list. Also, the interface will show “import custom library successfully!”
Installing Arduino Software
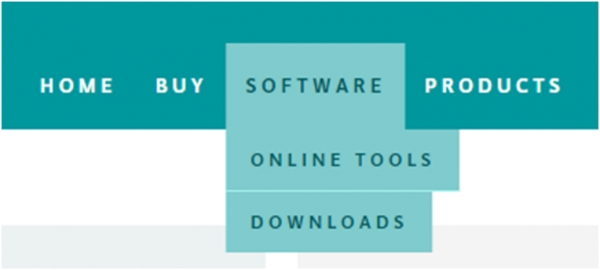
When you get the control board, first you should install the Arduino software and driver. We usually use the software Arduino 1.5.6 version. You can download it from the link below: https://www.arduino.cc/en/Main/OldSoftwareReleases#1.5.x Or you can browse the ARDUINO website to download the latest version from this link, https://www.arduino.cc, pop up the following interface.
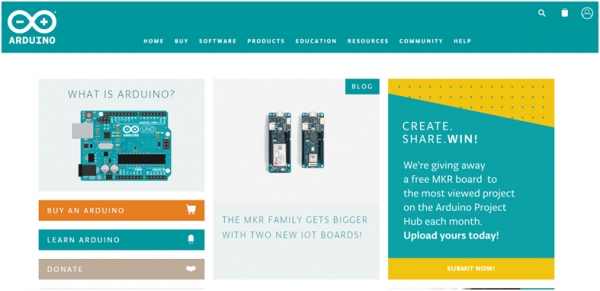
Then click the SOFTWARE on the browse bar, you will have two options ONLINE TOOLS and DOWNLOADS.
Click DOWNLOADS, it will appear the latest software version of ARDUINO 1.8.5 shown as below.

In this software page, on the right side you can see the version of development software for different operating systems. ARDUINO has a powerful compatibility. You should download the software that is compatible with the operating system of your computer. We will take WINDOWS system as an example here. There are also two options under Windows system, one is installed version, the other is non-installed version. For simple installed version, first click Windows Installer, you will get the following page.
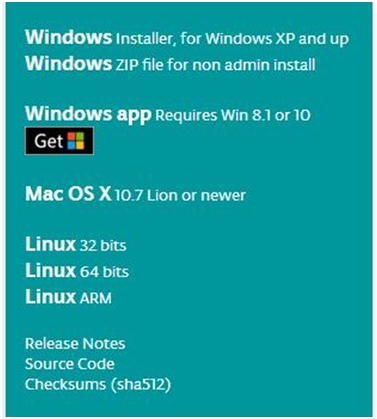

This way you just need to click JUST DOWNLOAD, then click the downloaded file to install it. For non-installed version, first click Windows ZIP file, you will also get the pop-up interface as the above figure. Click JUST DOWNLOAD, and when the ZIP file is downloaded well to your computer, you can directly unzip the file and click the icon of ARDUINO software to start it.
Installing Arduino (Windows)
Install Arduino with the exe. Installation package downloaded well.
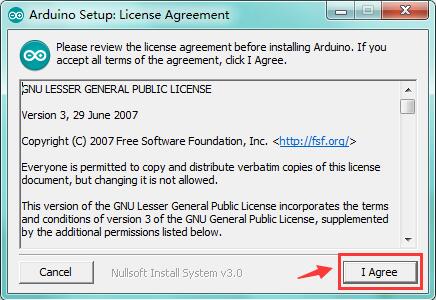
Click“I Agree”to see the following interface.
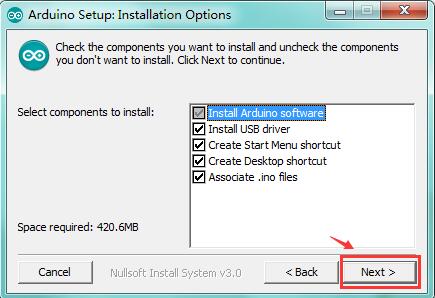
Click “Next”. Pop up the interface below.
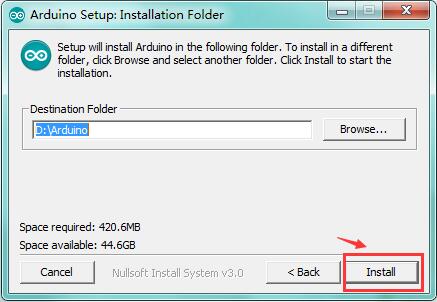
You can press Browse… to choose an installation path or directly type in the directory you want. Then click “Install” to initiate installation.
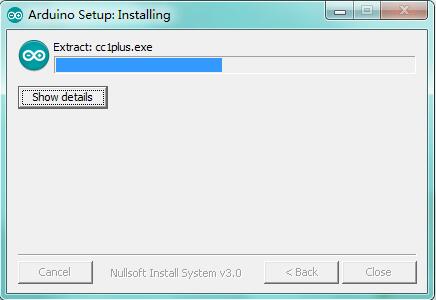
Wait for the installing process, if appear the interface of Window Security, just continue to click Install to finish the installation.
Installing Driver
Next, we will introduce the driver installation of UNO R3 development board. The driver installation may have slight differences in different computer systems. So in the following let’s move on to the driver installation in the WIN 7 system.
The Arduino folder contains both the Arduino program itself and the drivers that allow the Arduino to be connected to your computer by a USB cable. Before we launch the Arduino software, you are going to install the USB drivers.
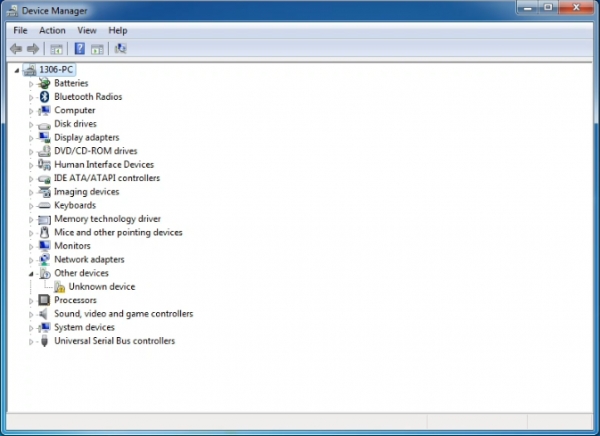
 Plug one end of your USB cable into the Arduino and the other into a USB socket on your computer. When you connect UNO board to your computer at the first time, right click the icon of your “Computer” —>for “Properties”—> click the “Device manager”, under “Other Devices”, you should see an icon for “Unknown device” with a little yellow warning triangle next to it. This is your Arduino.
Then right-click on the device and select the top menu option (Update Driver Software...) shown as the figure below..
It will then be prompted to either “Search Automatically for updated driversoftware” or “Browse my computer for driver software”. Shown as below. In this page, select “Browse my computer for driver software”.
After that, select the option to browseand navigate to the “drivers” folder of Arduino installation.

Click “Next” and you may get a security warning, if so, allow the software to be installed. Shown as below.
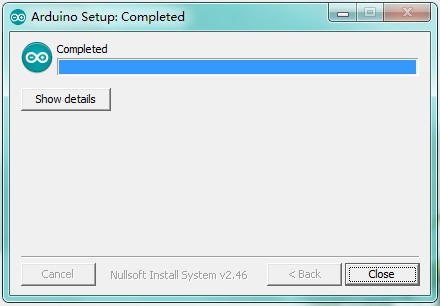
Once the software has been installed, you will get a confirmation message. Installation completed, click “Close”.
Up to now, the driver is installed well. Then you can right click “Computer” —>“Properties”—>“Device manager”, you should see the device as the figure shown below.
Let’s Get Started With Your Projects
Project 1: Hello World
Overview

This project is very simple. You can use only a main board and a USB cable to display the “Hello World!”. It is a communication experiment between the EASY Plug control board and PC. This is an entry experiment for you to enter the Arduino programming world. Note that need to use a serial communication software, Arduino IDE. In the above part, you can check the detailed use of Arduino IDE. Component Required:
EASY plug control board*1
USB cable*1 Component Introduction:

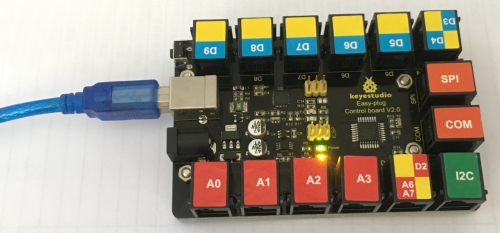
The processor used in OpenELAB EASY plug control board V2.0 is ATmega328. It has 5 single Digital ports labeled D5 to D9 (of which 3 can be used as PWM outputs), 1 dual-digital interface (D3-D4), 4 analog inputs (A0-A3), a Joystick socket (D2-A6-A7), a SPI, a serial port and an IIC communication interface. Also with a USB connection, a power jack, two ICSP headers and a reset button. It breaks out the IO ports with RJ11 6P6C plug. Connect It Up Connect the control board to your computer via a micro USB cable.
Upload the Code Below is an example code for displaying the Hello World!
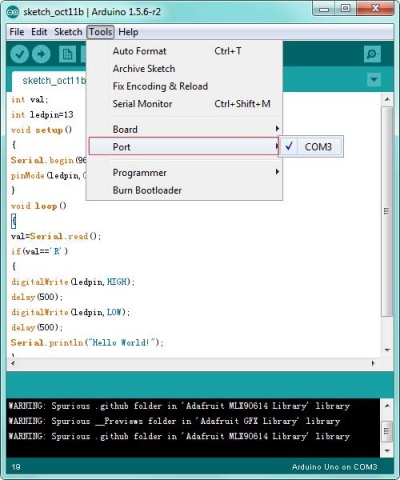
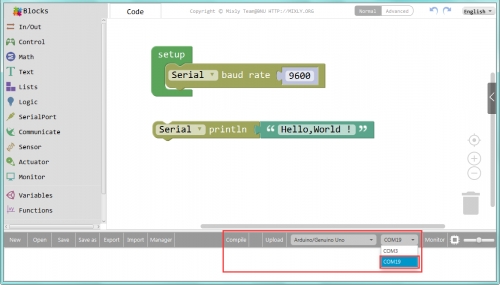
Select your serial port
Select the serial device of the Arduino board from the Tools | Serial Port menu.
Note: to avoid errors, the COM Port should keep the same as the Ports shown on Device Manager.

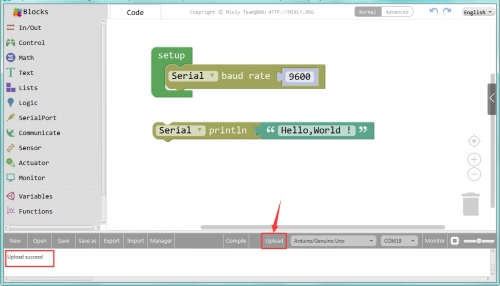
Then click verify button to check the errors. If compiling successfully, the message "Done compiling" will appear in the status bar.
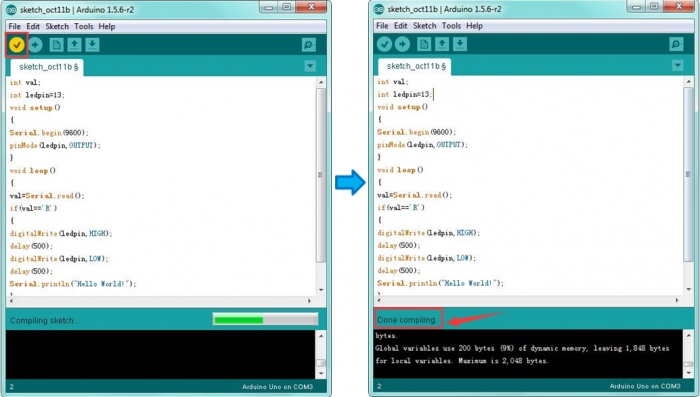
After that, click the “Upload” button to upload the code. If the upload is successful, the message "Done uploading" will appear in the status bar.

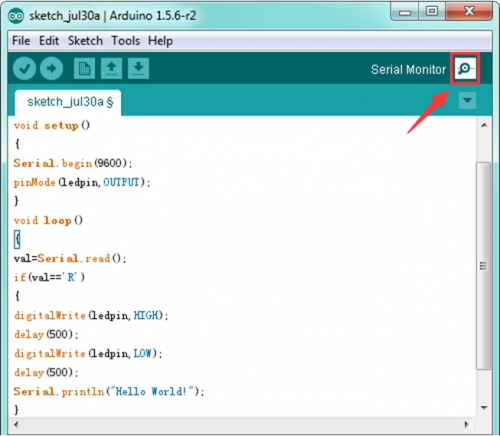
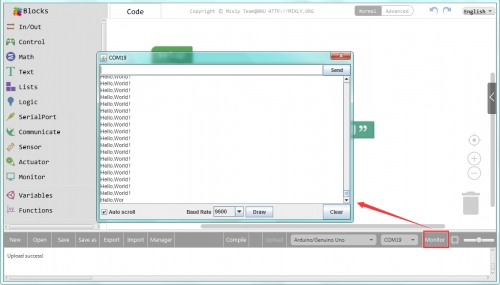
Open the Serial Monitor After that, click the monitor button to open the serial monitor.
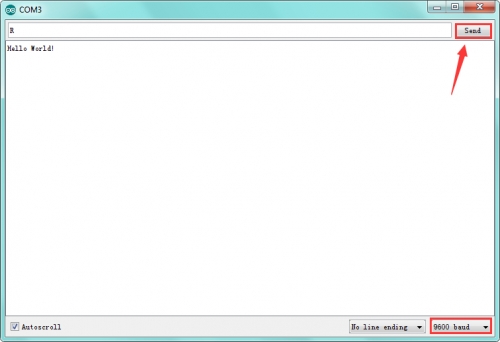
Then set the baud rate to 9600, enter an “R” and click Send, you should see the RX led on the board blink once, and then D13 led blink once, finally "Hello World!" is showed on the monitor, and TX led blink once. Congrats! Your first simple program is complete.
Note: In this project, we take Arduino code as an example to show Hello World. But in the following projects, we will take Mixly Code as example to start the experiments. It will be more simple and easier for you to get understand of the program.
How To Get Started With Mixly Projects
Import the Library
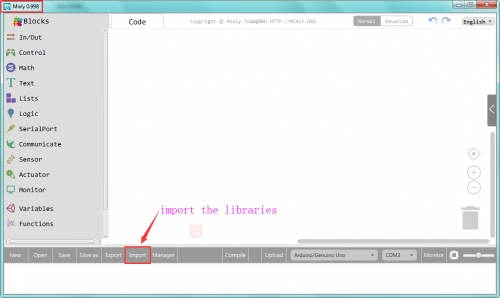
1) Begin with the Mixly projects, the first step you should import the corresponding library. Open the Mixly 0.998 software, click Import. Shown below.
2) Open the folder we provided, you can double-click to open the library KS_EasyPulg

3) If import the custom library successfully, you should see it on the Mixly blocks interface. Shown below.
Start with Mixly Project - Saying Hello World
1) Hookup Guide Connect the control board to your computer via a micro USB cable.
2) Open the Program Click Open to open your first program Hello World. Follow the steps below.
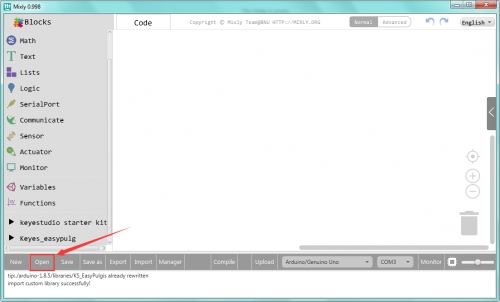
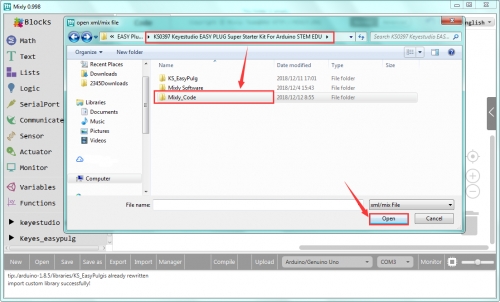
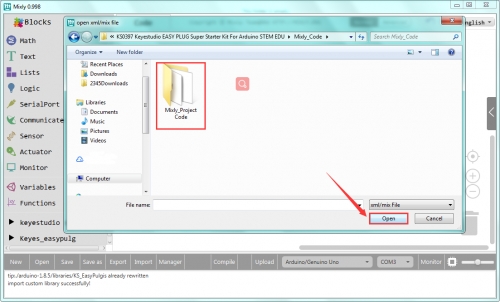
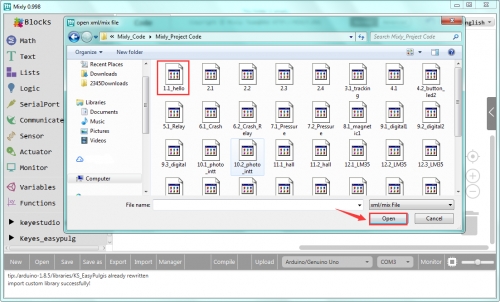
In fact, you can double click or directly drag the program to open Hello World. Then you should see the Blocks code, shown below.
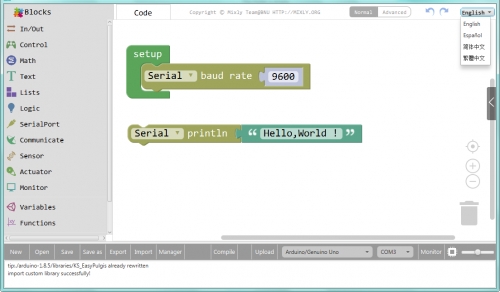
After that, select the proper Board and Port. Upload the code to your EASY Plug control board. 3) Displaying Hello World Finally, upload the code successfully, open the monitor and set the baud rate to 9600, you should be able to see the Hello World is showed on the monitor. Congrats! You make it !
4) Check Arduino Code What’ more, you can also click to check the Arduino code on the right side. Amazing! So powerful the Mixly blocks code is!
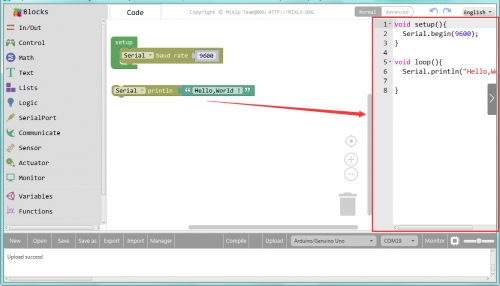
Is it more easy and simple to play the Mixly projects? Try your first Mixly blocks projects right now. Begin with the following projects to motivate your creations!
Last updated
Was this helpful?