Raspberry Pi 4B
Product Link
Introduction
I am a Raspberry Pi 4 Model B. Compared to the 3B+, my processor speed has significantly increased with rich multimedia capabilities, multiple memory versions, and superior connectivity. Integrated with a PCIe link connecting USB 2 and USB 3 ports, along with a native Ethernet controller. It features greatly improved GPU functionality, resulting in faster input/output speeds.

Features
BCM2711B0 (ARM Cortex-A72)
64-bit 1.5GHz quad-core
Choice of RAM
PI4B-1GB: 1GB
PI4B-2GB: 2GB
PI4B-4GB: 4GB
Gigabit Ethernet
802.11ac 2.4GHz/5GHz dual-band NIC
Bluetooth 5.0, BLE
USB 3.0 x 2, USB 2.0 x 2
micro HDMI x 2 (supports 4Kp60)
PoE header (supports PoE HAT)
MicroSD slot
3.5 mm audio jack
40PIN GPIO header
CSI camera interface
DSI display interface
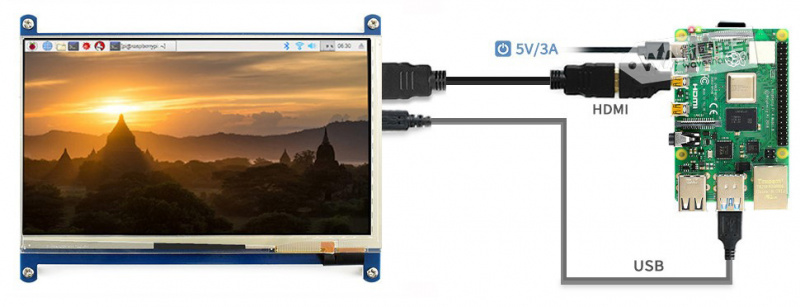
USB Type C power supply (5V/3A or above)
Product Size

How to use
Prepare an SD card and card reader.
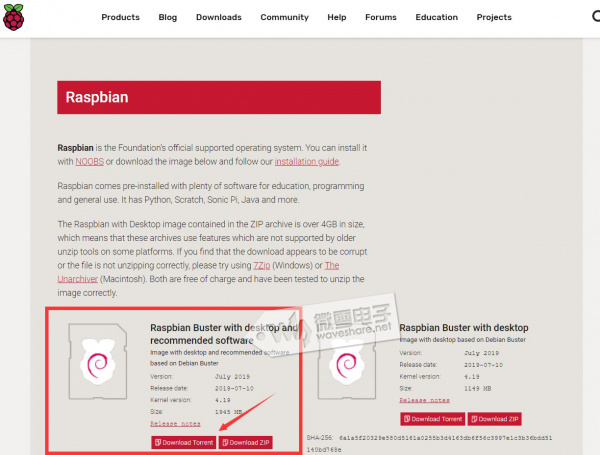
Download the system (click me to download) Raspberry Pi 4 needs to download the latest released system (or the following version as shown in the figure) before it can be used.
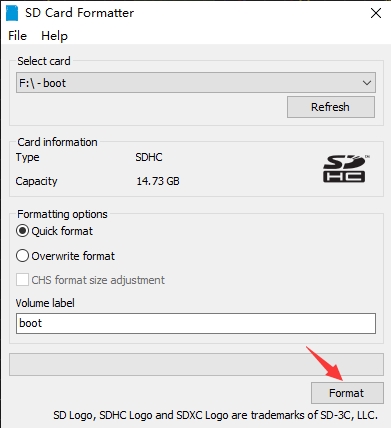
Format the SD card: Use a card reader to insert the SD card into the computer, and use the SDFormatter.exe software to format the SD card. Click here to download SDFormatter.exe, and click to format the SD card.
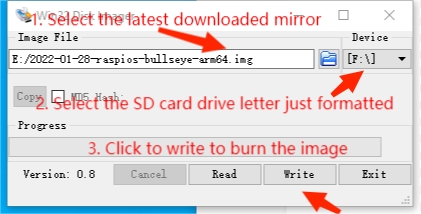
Burn the image: use Win32DiskImager.exe to burn the image. Select the image to be burned, and click "Write" to burn, (click here to download Win32DiskImager.exe). After the burning is completed, you will be prompted whether you want to format, here you need to click Cancel.
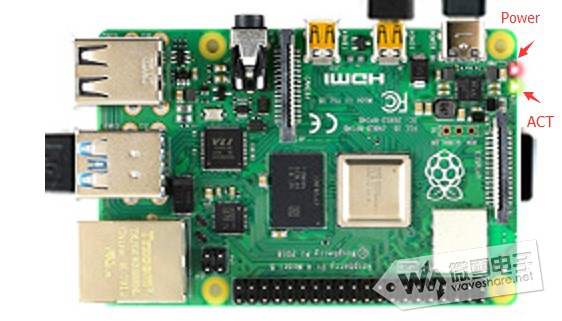
Start RPI4B: Insert the SD card after programming into the Raspberry Pi, and connect the adapter with the Type-C interface of 5V 3A to start the Raspberry Pi. Normally, you can see that the Power light is always on red, and the ACT green light is flashing.
Connect peripherals such as an on-screen mouse and keyboard to start your Raspberry Pi journey.
Resource
General Tutorial Series
FAQ
Question:How to assign the touch to the main screen of the Raspberry Pi 4 dual-screen display?
Answer:
1. Enter xrandr on the Raspberry Pi terminal to check the HDMI-ID where the main screen is located (mostly HDMI-1);

2. Enter xinput in the Raspberry Pi terminal to check the touch ID where the main screen is located (there are 2 touch IDs, if you don't know which one is the main screen, you can try both);

3. Run the command: xinput map-to-output <touch ID> <HDMI-ID>
(After matching the ID value, run the command to specify the touch to the main screen, such as: xinput map-to-output 7 HDMI-1 )
![]()
4. Since the command needs to be re-entered every time the boot is turned on, this command can be added to the boot auto-start:
sudo nano /etc/xdg/lxsession/LXDE-pi/autostart
Add: xinput map-to-output 7 HDMI-1 (remember to change to your own corresponding ID), then restart.

Last updated
Was this helpful?