Raspberry Pi 5
Product Link
Introduction
Raspberry Pi 5 is the latest generation flagship product in the Raspberry Pi series, following the success of the Raspberry Pi 4. It provides a 2-3x increase in CPU performance over the previous generation. Boasting rich multimedia, multiple memory versions, and superior connectivity, it also integrates with RP1 I/O controller with broader bandwidth USB3 and additional PCIe interfaces for faster data transmission.

Features
Broadcom BCM2712 (Arm Cortex A76)
64-bit 2.4GHz quad-core processor with 512KB of L2 cache and 2MB of shared L3 cache
RAM
PI5-1GB: 1GB
PI5-2GB: 2GB
PI5-4GB: 4GB
PI5-8GB: 8GB
Gigabit Ethernet
2.4GHz/5GHz dual-frequency 802.11ac Wi-Fi
Bluetooth 5.0, BLE
USB 3.0 x 2 (supporting simultaneous 5Gbps operation), USB 2.0 x 2
micro HDMI x 2 (support 4Kp60)
Gigabit Ethernet (PoE support)
MicroSD card slot
40PIN GPIO header
2 × 4-lane MIPI DSI/CSI interface
USB Type C(5V/5A)
Power button
RTC, powered by external batteries
PCIe 2.0 x1 interface
UART header
Dimensions

How to Use
1. Preparation: SD card, card reader.
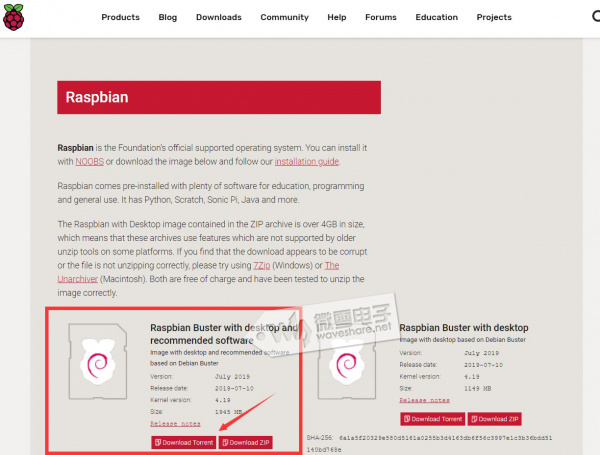
2. Download the system (Click here to download), Raspberry Pi 4 requires the latest system before using (or later version as shown below):
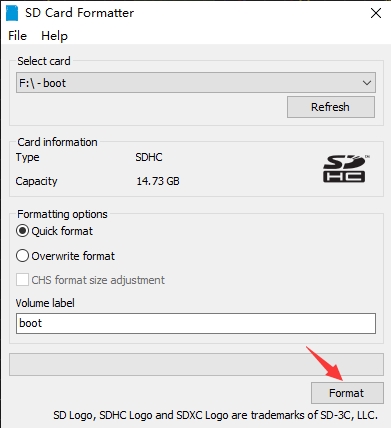
3. Format the SD card: Insert the SD card into the PC with a card reader, and format the SD card through SDFormatter.exe. Click here to download SDFormatter.exe, and click to format the SD card.
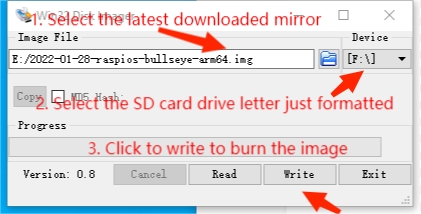
4. Program the image: use Win32DiskImager.exe to burn the image. Select the image to be burned, and click "Write" to program, (click here to download Win32DiskImager.exe). After the programming is completed, you will be prompted whether you want to format, here you need to click Cancel.
5. Start RPI5: Insert the SD card after programming into the Raspberry Pi, and connect to the adapter with the Type-C interface of 5V 5A to boot the Raspberry Pi. Normally, you can see that the Power light is always on red, and the ACT green light is flashing. 6. Connect peripherals such as screen, mouse, and keyboard to start your Raspberry Pi journey.
UART Login
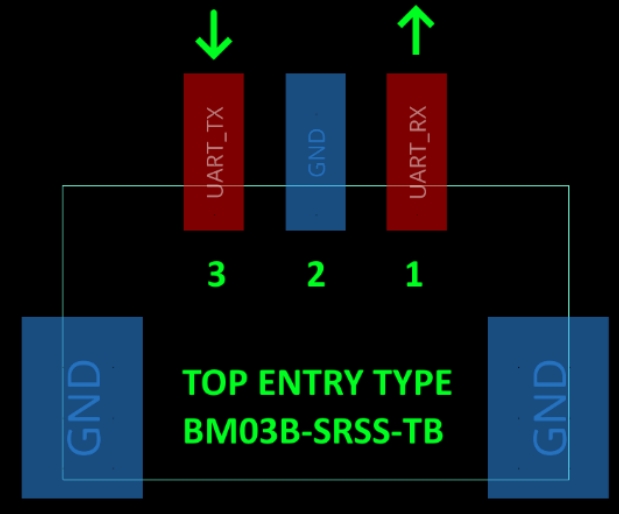
The Raspberry Pi 5 has a dedicated connector for debugging UART, supports a maximum baud rate of 921,600bps, and is configurable via EEPROM parameters. It is always active and enabled, and supports direct access to early boot and firmware information; as well as the Linux console after booting.
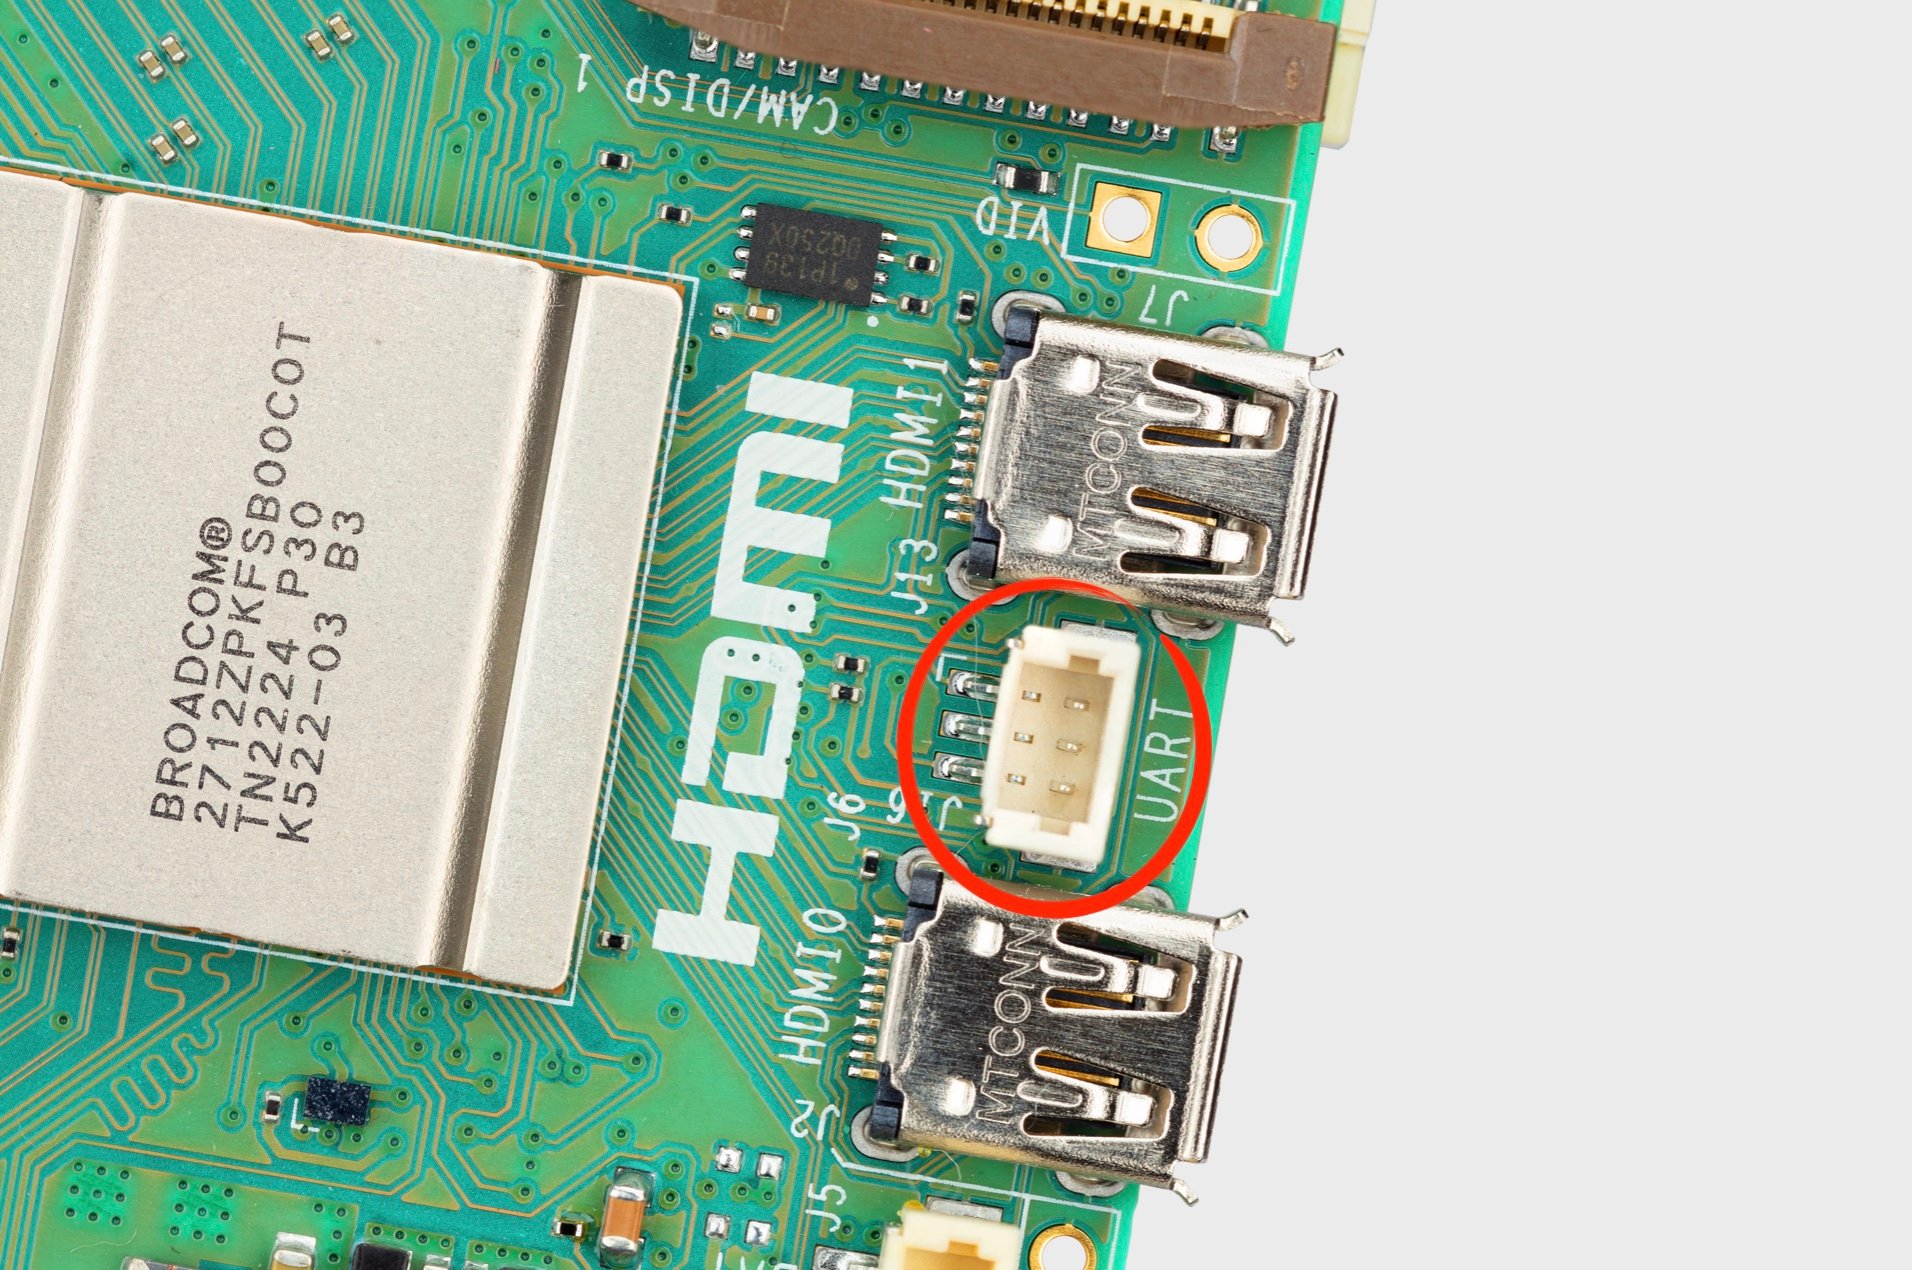
The UART connector has three pins.
RTC (Real-time Clock)
Hardware
The RTC is powered by adding a backup battery using the J5 (BAT) connector and will work without a connection as long as the PI5 is kept powered on. Optionally, you can purchase a dedicated RTC battery for the PI5.

Siftware Debug
The default device is /dev/rtc0.As for the time, you can see the current time by typing "date" in the command line, connecting to the network Raspberry Pi system will automatically network timing, if the default RTC device has a connection and is working properly, then the RTC time will be updated after the automatic network timing. "sudo hwclock -r" for reading the RTC time, if there are many RTC devices, you can use "-f" to select the corresponding device (such as "sudo hwclock -f /dev/rtc1 -r").
Hwclock
System clock -> hardware clock (RTC)
sudo hwclock -wSynchronize hardware clock (RTC) -> system clock
sudo hwclock  -s
 #You need to turn off the network, or turn off network timing, otherwise it will be changed back
Set hardware clock time (RTC):
sudo hwclock --set --date="9/8/2023 16:45:05"View the hardware clock (RTC)
sudo hwclock -rDisplay version information
sudo hwclock --verboseAuto Wakeup
To support low-power mode for wake-up alerts, add the configuration:
sudo -E rpi-eeprom-config --edit
#Add the following two lines:
POWER_OFF_ON_HALT=1
WAKE_ON_GPIO=0
#Reboot the device after adding (you can connect to the serial port log to view more update log)
sudo reboot
#You can use the following method to test the function:
echo +600 | sudo tee /sys/class/rtc/rtc0/wakealarm
sudo halt or sudo poweroff
#Will wake up and reboot after 10 minutes
RTC Battery Charging
Note: Please check whether your RTC battery supports charging and the maximum input voltage before adding the following commands.
sudo nano /boot/firmware/config.txt
#Add
dtparam=rtc_bbat_vchg=3000000
#3000000 indicates the maximum voltage, charging to 3V will disable charging, and the voltage lower than 3V will start to trickle charging
FAQ
Question:How to configure the touchscreen with dual displays?
Answer:
1. Input "xrandr" on the Raspberry Pi terminal to view the HDMI-ID of the main display (most are HDMI-1);

2. Input "xinput" on the Raspberry Pi terminal to view the touch ID of the main display; (there are two touch IDs. If you do not know which one is for the main display, you can try them both.)

3.Run the command: xinput map-to-output <touch ID> <HDMI-ID>;
(The ID value should be changed according to the actual ID checked, for example xinput map-to-output 7 HDMI-1 )
![]()
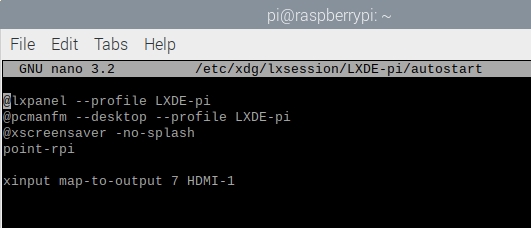
4. Each time you start Raspberry Pi, you need to re-enter the command to configure the touchscreen, so you can add this command to the auto-start: sudo nano /etc/xdg/lxsession/LXDE-pi/autostart
Add the line: xinput map-to-output 7 HDMI-1 (Note that you need to change the ID corresponding to yours), then reboot Raspberry Pi.
Last updated
Was this helpful?