Seeed Studio XIAO SAMD21 Arduino Microcontroller
Product Link
Introduction
The Seeed Studio XIAO SAMD21 is the smallest member of the Seeeduino family. It comes with the powerful ATSAMD21G18A-MU low power microcontroller. On the other hand, this small board performs well in terms of processing performance but requires less power. In fact, it is designed in tiny size that can be used for wearables and small projects.
Features
Powerful CPU: ARM® Cortex®-M0+ 32bit 48MHz microcontroller (SAMD21G18) with 256KB Flash and 32KB SRAM.
Compatibility: Compatible with Arduino IDE.
Item is easy to handle: Designed to fit breadboards.
Mini size: for wearables and small projects.
Multiple development interfaces: 11 digital/analog pins, 10 PWM pins, 1 DAC output, 1 SWD Bonding pad interface, 1 I2C interface, 1 UART interface, 1 SPI interface.
Specifications
CPU (Central Processing Unit)
ARM Cortex-M0+ CPU running at up to 48MHz (SAMD21G18)
(electronic) flash memory
256KB
SRAM (Static Random Access Memory)
32KB
Digital I/O Pins
11
Analog I/O Pins
11
I2C interface
1
SPI interface
1
QTouch
7 (A0,A1,A6,A7,A8,A9,A10)
Serial port interface
1
Power Download Interface
Type-C
operating voltage
3.3V/5V DC
Sizes
20×17.5×3.5mm
Pinout


Dimensions
Size :20×17.5×3.5mm
How to Use
Hardware
Materials required
Seeed Studio XIAO SAMD21 x1
电脑x1
USB typc数据线 x1
presentation
Some USB cables can only supply power, not transfer data. If you don't have a USB cable or don't know if your USB cable can transfer data, you can check seeed USB type C support USB 3.1.
Step 1. Prepare a Seeed Studio XIAO SAMD21 and a Type-C cable.
Step 2. Connect the Seeed Studio XIAO SAMD21 to your computer and the yellow LED will light up immediately afterward.
Software
Description
If this is your first time using Arduino, we recommend that you refer to Getting Started with Arduino
Step 1. Install Arduino Software
Download Arduino IDELaunch Arduino application
Double-click the Arduino application (arduino.exe) you downloaded earlier.
clarification
If the Arduino software loads a different language than you need, you can change it in the Preferences dialog. See the Arduino Software (IDE) page for more information.
Step 2. Open the Blink example
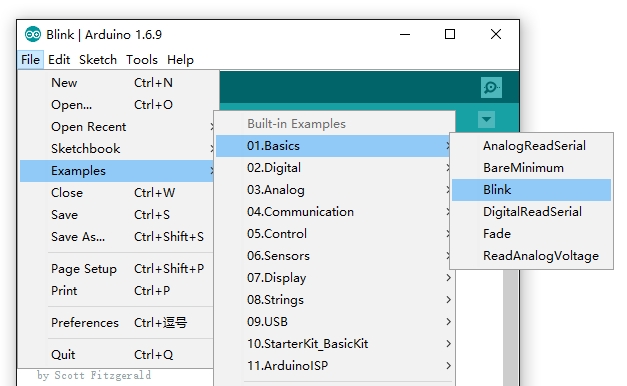
Open the LED flashing example: File > Examples >01.Basics > Flashing.
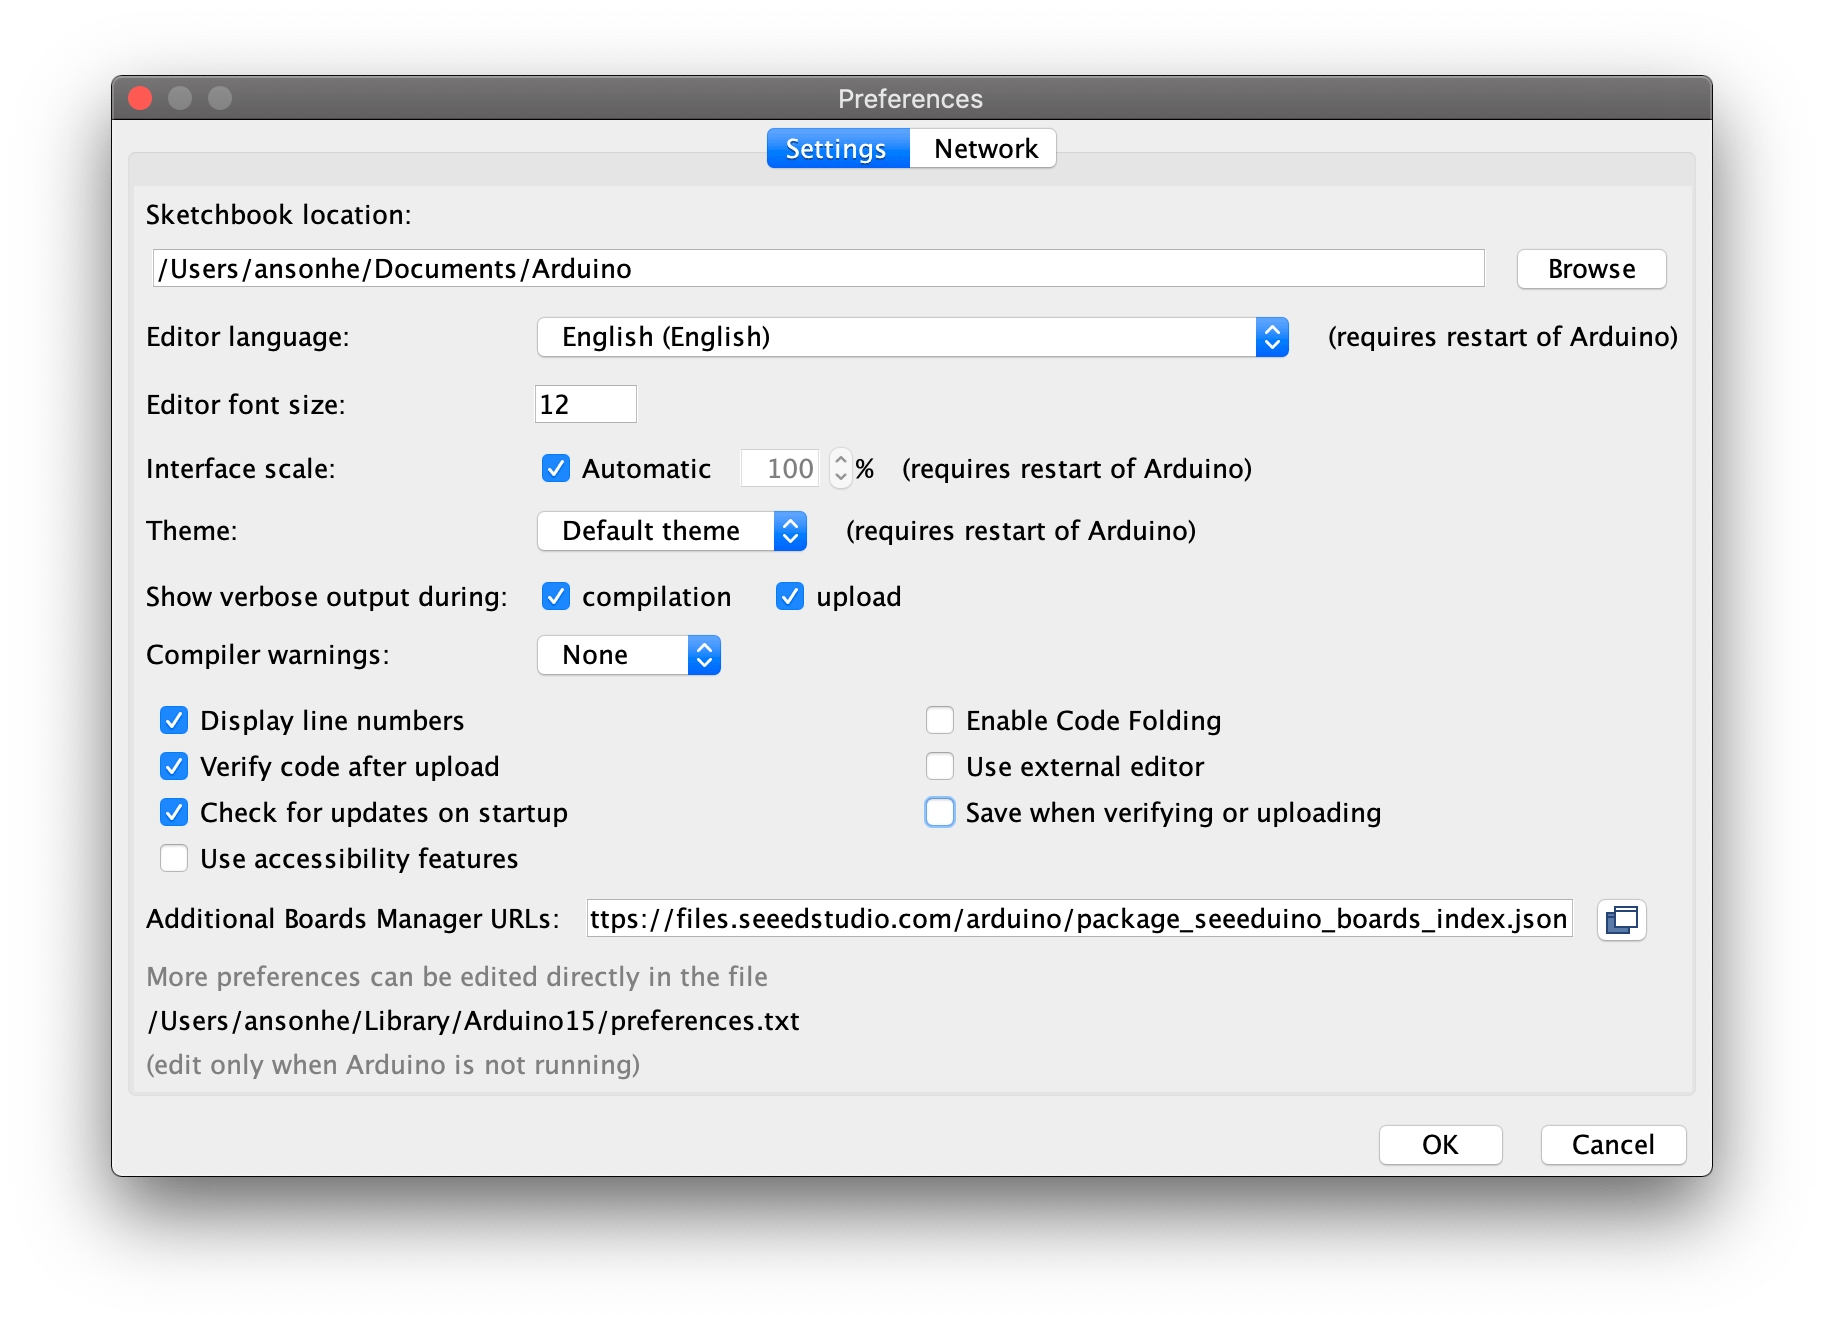
Step 3. Add the URL of the Seeeduino board to your Arduino IDE.
Click File > Preference, then add the following URL to "Additional Boards Manager URLs":
https://files.seeedstudio.com/arduino/package_seeeduino_boards_index.json
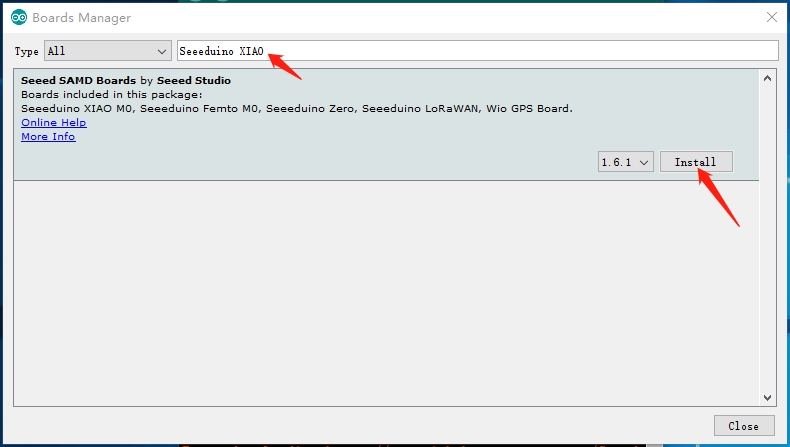
Please click Tools-> Board-> Boards Manager... , type "Seeed Studio XIAO SAMD21" in the search box and "Seeed SAMD Boards" will appear.
Step 4. Select your board and port.
After installing the development board, click Tools-> Board, find "Seeed Studio XIAO SAMD21 M0" and select it. Now you have the Seeed Studio XIAO SAMD21 development board setup in the Arduino IDE.
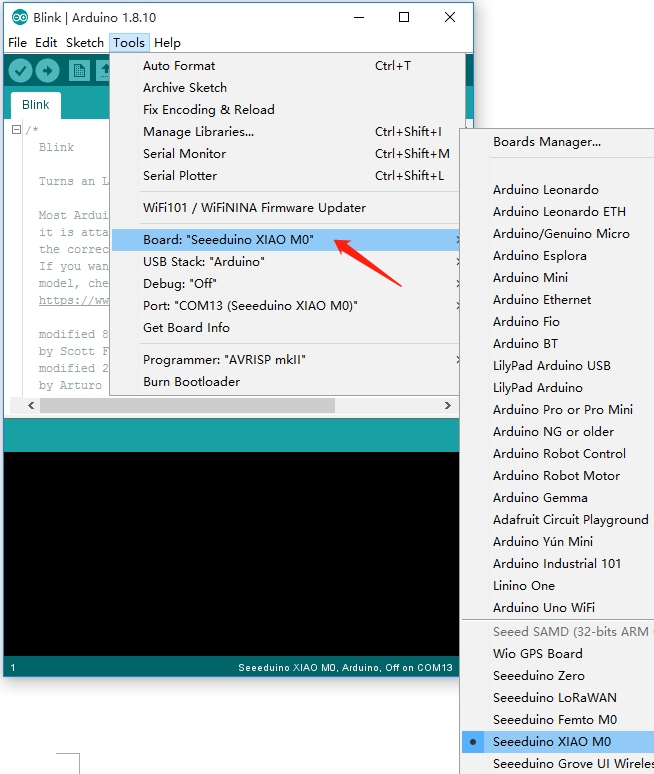
Select the Arduino development board from the Tools | Ports menu. This may be COM3 or higher (COM1 and COM2 are usually reserved for hardware serial ports). If you are unsure, disconnect the Arduino development board and reopen this menu; the disappearing port option should be the Arduino development board. Reconnect the board and select the port.
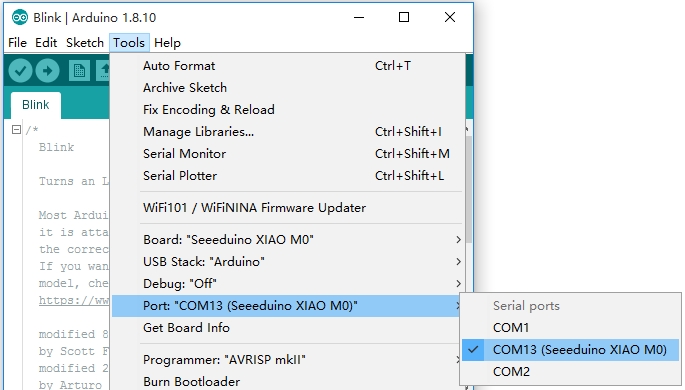
Step 5. Upload Program
Now, just click the "Upload" button in the environment. Wait a few seconds and if the upload is successful, the message "Done uploading." will appear in the status bar.

A few seconds after the upload is complete, you should see the Pin 13 (L) LED on the development board begin to blink (in orange). If so, congratulations! You have successfully run the Arduino. if a problem occurs, please refer to the troubleshooting recommendations.
Last updated
Was this helpful?
